C-Sharp Programming Beginner Tutorial: C# and the Almighty Button
Hi Everyone, I'm Back at it again with my C# For Beginners Tutorials. Here on out, any and all that I do will be focused on a specific component. This will allow my readers to learn the basic concepts and some tips & tricks that can be done to utilize these components from a Visual Side and a Functional side.
Obviously, if you have read the Title of this Post, then you should know that I will be starting with the Button. The Button is, literally, a clickable object on a Form that usually does something or shows something. It can be a directional trigger in an Arcade-style game, a Quiz Game answer buzzer, a trigger to show an Excel Document, even a push-button control to post a story on Steemit (if one knows how, which I've not been able to figure out thus far).
The Button component might very well be the most versatile and most used components in the entire C#/Application-Developer Toolbox. I would estimate, personally, that 95% of applications that are developed contain at least a single button. Whether it's to close the application or start a new game or go to a web page or any number of desired results.
Without any further ranting...
The Almighty Button
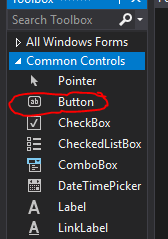
Below you will see images from my Visual Studio IDE (Integrated Development Environment) where I place components and add code for functionality. You will see the first thing to do is to go to the Toolbox and click/drag the Button component from the Toolbox onto the Form. You can see where I am going to choose the Button from the Visual Studio Common Controls section of the Toolbox.
I moved the Button to the center of the Form and shrank up the area (as can be seen below). I had no reason to put it there aside from making it the centerpiece to the Tutorial Lesson.
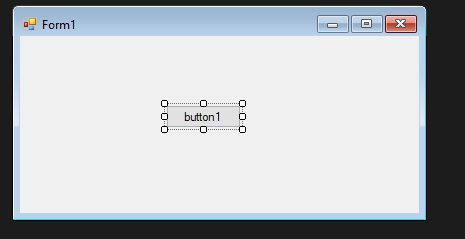
So, there is our button and it will do nothing right now as there is no code functionality behind the button. Let's make some fun little changes to the button to show what you can actually do with it before even coding any logic.
Properties of the Button
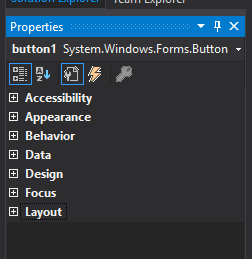
Each component that is on a Form has a set of Properties that can be changed and modified. If you have not selected the Button (it has no Resize Handles... these are the white dots and the rectangle closely surrounding the Button in my image above), go ahead and click it. If it's already selected, find the Properties panel (below) to see all of the individual properties that can be used.

As you can see, this is not the entire list (note the Scroll Bars). Here's what the individual Sections look like if they are completely collapsed:
Each Section describes different base Functionality that you can set for the Button when it's initially created (ie. when the application starts and the Button is initialized). I'm going to do a short introduction to each of these Sections and the unique Properties within each one. I will not be going into too much detail except as tips/suggestions that arise as I'm going through each.
Setting up the "Done" Button
So now that you have a Button on the Form, you want to change how it looks. There are too many unique items to go over each one, so I'm going to make this easy by showing you the ones that I change on a normal basis and some that I will play around with if I'm feeling spunky.
I always start with the basic Button, then I'll change its Name and Text Property to fit what I'm doing. So, assuming the Button is going to Close your Form, I usually name it "Done" with the same as the Text. To do this, make sure the Button is selected and find the Name Property in the listing. You will see what it looks like in the list after this is done.
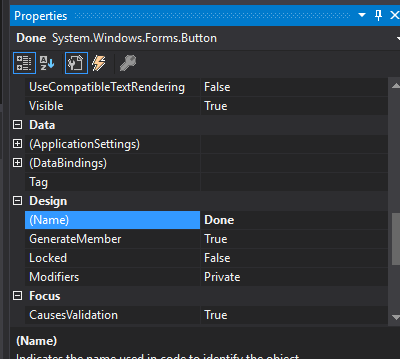
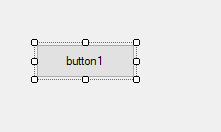
...and the Button still says "button1" (the default for the first non-named button).
Now I'll change the Text Property to also reflect "Done" so that it shows up on the Button itself. Here are the 2 images to show this:
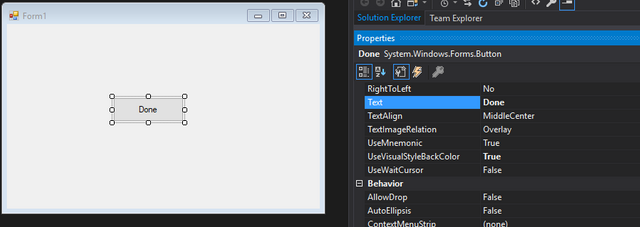
So now we have a Button captioned and named as "Done".
Let's play with the Font
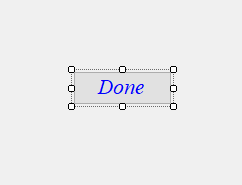
Now that the "Done" Button is set up, let's go ahead and play around with the font that will be used for the captioning. Let's make it Blue, Times New Roman, Italicized & Sized 16. Easy-peasy-lemon-squeezy.
First, find the Forecolor Property and select it. You will see a little down-arrow to the right of the Value field that you can click to pull up all of the options. Click the arrow and choose the "Custom" Tab and select the Blue color.
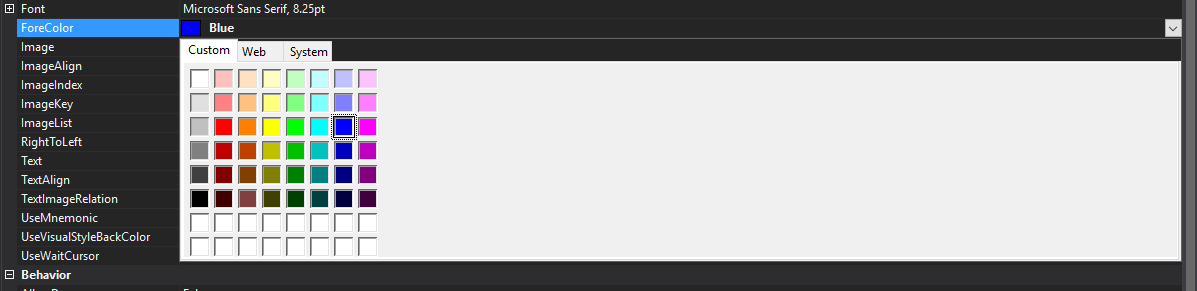

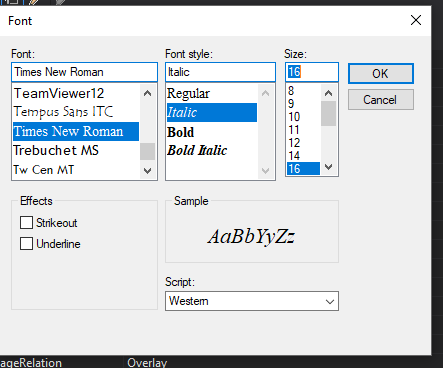
See? Now we have a Button with the word "Done" in Blue. It's no more difficult to set the Font to Times New Roman, Italicized, and Size 16. We will go to the Font Property, select it and click the triple-dot box to the right (as in the first image below) which will bring up the "Font" dialog box (second image below). Here we can select the Font, Font Style, and Size all in one fell swoop. I've selected the appropriate options, which has changed how the word "Done" displays on the Button (third image below).

That's how you change Fonts!
Adding a Princess, Changing a Finger & Moving the Text
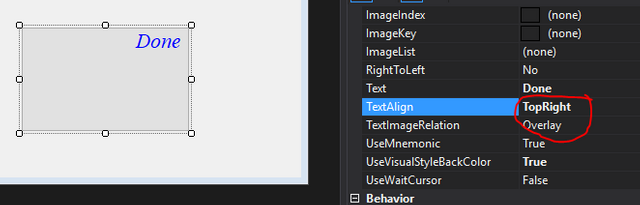
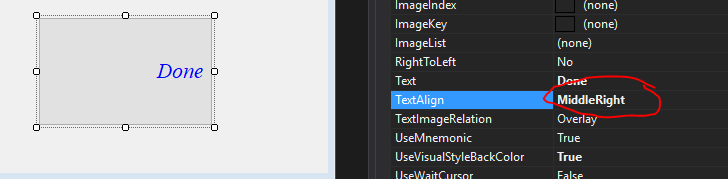
This may sound complicated, but it's not too tough if you know where to look. We'll start from the end (Moving the Text) and just slide the word "Done" to the right side of the Button. To do so, find the TextAlign Property and double-click until you have the word where you want it. I'm going to resize the Button by grabbing a corner handle and making it larger so we can see where "MiddleRight" actually places the word compared to "TopRight" (below images).
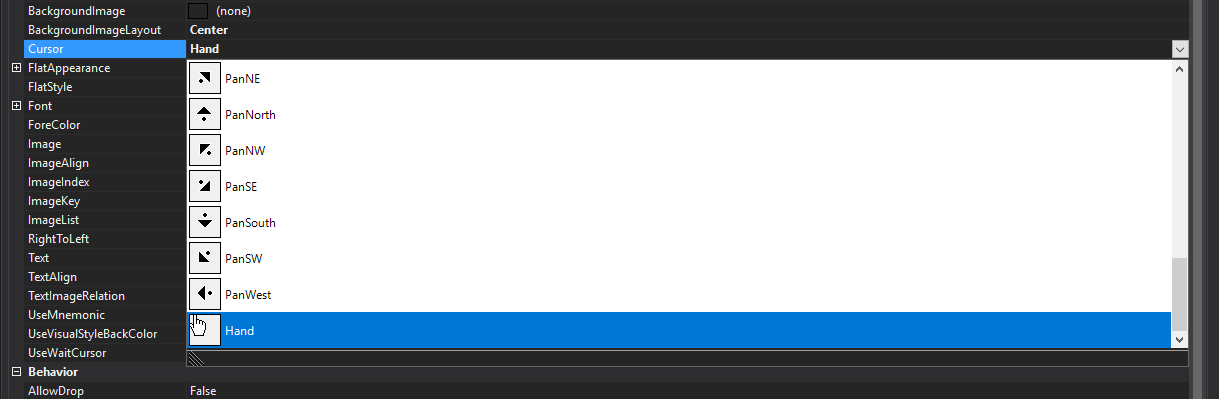
Ok, backtracking once more we will change the Cursor to a Hand instead of the Arrow Pointer. Use the Cursor Property to change the value by selecting it and clicking the down-arrow to the right of the Value. This will show the drop-down list of different Cursors. Choose the one labeled "Hand" and it will change the Cursor to the Hand when hovering over the Button.

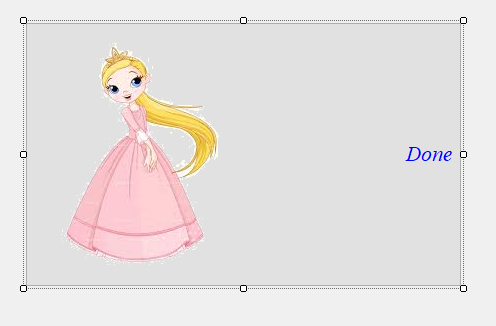
Pretty cool so far, right? Well, let's add a Princess leaning away from the word "Done". How? Without too much effort, that's how!
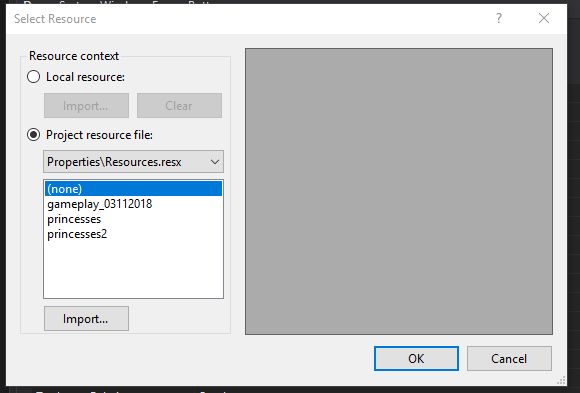
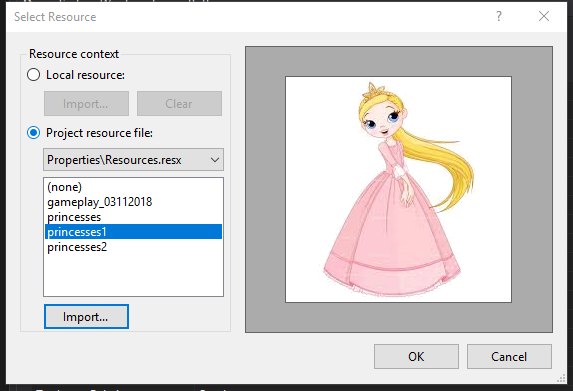
So we will start by going to the Image Property. Select it and click the triple-dot box to the right of the Value. This will pop up the "Select Resource" dialog box (image below... you will notice some resources already there). In a previous Tutorial you may recall that my game included images of Princesses. I will re-import the "princesses" image by selecting the "Project resource file:" option and clicking the "Import..." Button below the listing. When the "Open" file dialog box pops up I will navigate to the image and select it. Since I had already imported it, it will rename the previous import to "princesses1" instead (second image below). Select "princesses" and click "OK" to place it on the Button. Since the ImageAlign Property defaulted to "MiddleLeft" we need not do anything further. You can see the results below.
Now, let's make it do it's job!
End It!!
So, now that we have the image, we can actually add functionality. Double-click the Button to add the function automatically (which is how I almost always do things, the easy way) and jump to the code.
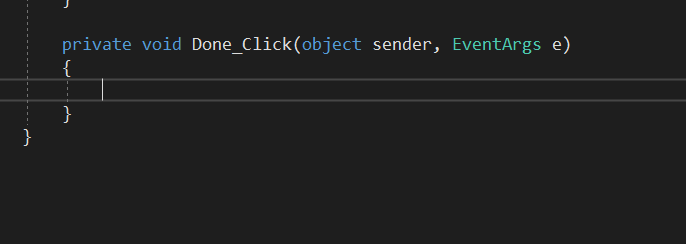
Yes, it's empty. Let's add code between the 2 braces below the "private void Done_Click(object sender, EventArgs e)" line of code! The code should just be a simple "this.Close();" (don't forget the ending semicolon or it won't work). You may notice that it auto-suggests the options as you type, if you are using an IDE with IntelliSense.
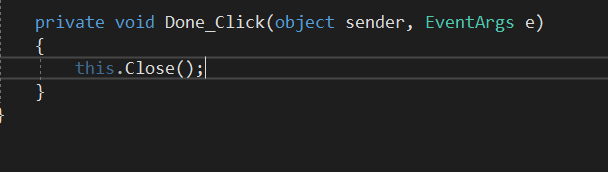
Now, if you run the program you can click the "Done" Button with the Princess on it and the program will exit. That's about as simple as it gets, and normally you will probably not even do that much work on the visual appearance as you'll be using the code Functionality to perform tasks.
I hope you enjoyed this First-in-the-next-line-of-Tutorials! Thanks for reading and Happy Learning!!
Lessons Learned
Here are the links to your lessons learned (or not learned, if you need to go back and learn them):
C# Programming Beginner Tutorial: Basic Concepts and Ideas
C# Programming Beginner Tutorial: A First look at actual code using D&D as the Project
C# Programming Beginner Tutorial: Variables & Data Types to Fuel the Gaming Engine!
C# Programming Beginner Tutorial: Designing the Game with Programming Logic in Mind (Part 1)
C# Programming Beginner Tutorial: Designing the Game with Programming Logic in Mind (Part 2)
C# Programming Beginner Tutorial: Designing the Game with Programming Logic in Mind (Part 3)
C-Sharp Programming Beginner Tutorial: Designing the Game with Programming Logic in Mind (Part 4)
C-Sharp Programming Beginner Tutorial: Rock! Paper! Scissors!
C-Sharp Programming Beginner Tutorial: No-Frills Dungeon Crawler (Part 1)
C-Sharp Programming Beginner Tutorial: No-Frills Dungeon Crawler (Part 2)
C-Sharp Programming Beginner Tutorial: No-Frills Dungeon Crawler (Part 3)
C-Sharp Programming Beginner Tutorial: No-Frills Dungeon Crawler (Part 4)
C-Sharp Programming Beginner Tutorial: No-Frills Dungeon Crawler (Part 5)
Wow great tutorial on C its great learn it today i cleared much things.
I’m glad the tutorials I write are helpful.
great writing sir...its very informative
Thank you. I appreciate it.
that's pretty cool to know.....
Programming is very cool if you ask me.
this is so helpful post for beginner
I agree that this should be good for beginners.
Sir @dbzfan4awhile,
Great sharing sir. The beginner will get muvh help from your posts. Thanks for these tips sir. I must try these. Best of luvk sir. Go on.
Thank you very much! I hope that these beginner tutorials find their way to everyone that wants to learn programming.
technology changes life..
Indeed. Technology has changed the very fabric of our existence so far. I do wonder if it’s for good or ill though.
This post has received a 7.72 % upvote from @booster thanks to: @dbzfan4awhile.