SEC | S20W4 | Google Sheets features and functionality (Creating Forms & Sheets)

Hello everyone,
It is the fourth week of the Steemit Engagement Challenge for season 20 and we are delighted to share another important topic that may interest you. Today we are going to be looking at the topic Google Sheets features and functionality (Creating Forms & Sheets). For easy understanding and effectiveness of learning, we are going to break this topic into smaller segments and discuss each segment one after the other.
Google Sheets is an online spreadsheet program that is also part of the Google Docs Editor which allows users who have Google accounts to create, edit, and collaborate on spreadsheet work not minding your locations. So this enables people to work together effectively without being in the same place.
One of the things that makes Google Sheets stand out among other spreadsheet programs is the collaboration it offers. Today we see how this has made Steemit seamless as well because many groups within the platform make use of these tools e.g. the curation teams, booming communities, and many more.
Basic Features of Google Sheets
- Core Features
- Collaboration Features
- Data Analysis & Automation
- Integration with Other Google Services
- Comparison with Excel
- Security
- Advanced Features
- Use Cases
Core Features
Real-time collaboration: As I mentioned earlier one of the major features of Google Sheets is real-time collaboration. Different users can work on the same Google Sheets at the same time and anywhere they are they can see changes being effected in their sheet.
Cloud storage: Google Sheets are usually stored in the drive and that is why you must have a Google account before you can access it. Also because it is stored in the cloud, you can access it anywhere you find yourself and with any device that is connected to the internet.
Offline access: Google Sheets allows for offline access which means you can easily access the spreadsheet offline and make your editing once you allow that permission and when you are done with your editing and you come online the changes will reflect for others to see immediately.
Formulas and functions: Google Sheets supports a wide array of functions similar to Microsoft Excel, such as SUM, IF, VLOOKUP, INDEX/MATCH, ARRAY FORMULA, and more advanced formulas for data manipulation and analysis.
Data visualization: Just as we have done on Excel spreadsheets, Google Sheets also allow you to create different types of charts such as bar charts, pie charts, and scatter plots, to visualize data.
Add-ons: Extensions can be added to improve functionality. There are add-ons for data analysis, connecting to other apps, creating reports, and automating tasks.
Collaboration Features
- Sharing permissions: Permission is another important feature that makes the Google Sheets stand out. You can control the access that the different users have such as what they can do in the sheet e.g (View, Comment, Edit).
- Commenting: Collaborators can add comments to specific cells, allowing for discussion around data points without altering the spreadsheet itself.
- Version history: You can view a detailed history of edits made by any collaborator and restore the spreadsheet to a previous version if needed.
Security :
- Google Sheets is very secure in the sense that you can include some restrictions such as view-only access and lots more. Also, files on Google Sheets can be added additional protection such as two-factor authentication and lots more.
Creating Google Forms
Creating a Google Form is simple and useful for collecting information, conducting surveys, quizzes, or gathering feedback. Here's a step-by-step guide:
Steps to Create a Google Form:
- Go to Google Forms:
- Open your browser and go to Google Forms.
- You can also access it through Google Drive by clicking on New > Google Forms.

- Start a New Form:
- Click on Blank to start a new form from scratch.
- Alternatively, you can choose from available templates (e.g., contact form, event registration, etc.).
Title and Description:
- Title your form: Enter a title for your form at the top.
- Form description: Add a description below the title to explain what the form is about.
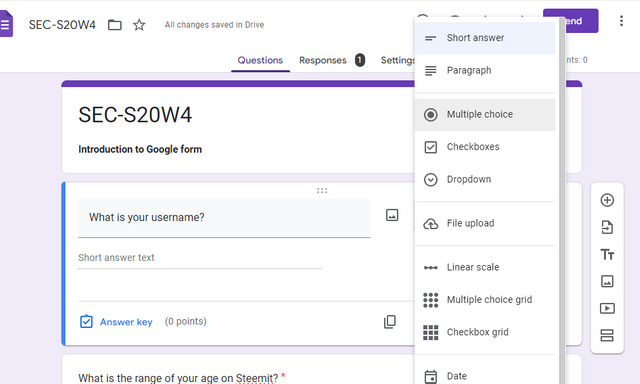
Add Questions:
- Click on the “Untitled Question” field to add your first question.
- Choose the question type from the dropdown menu (Multiple choice, Short answer, Paragraph, Checkbox, Dropdown, etc.).
- Write the question text in the input field.
- Add options or possible answers (if applicable).
Customize Question Settings:
- To make a question required, toggle the Required button at the bottom-right of the question.
- To duplicate, delete, or add more options, use the icons at the bottom of each question.
Add More Questions:
- Click the + (Add question) button on the right side to add more questions.
- You can also add a section break, image, video, or description using the tools on the right.
Form Settings:
- Click on the gear icon (Settings) in the upper-right corner to configure form settings:
- General: Collect email addresses, limit responses, or allow respondents to edit.
- Presentation: Show a progress bar, shuffle question order, or add a confirmation message.
- Quizzes: If creating a quiz, enable this and assign point values to questions.
- Click on the gear icon (Settings) in the upper-right corner to configure form settings:
Preview Your Form:
- Click the eye icon (Preview) at the top to see what your form will look like for respondents.
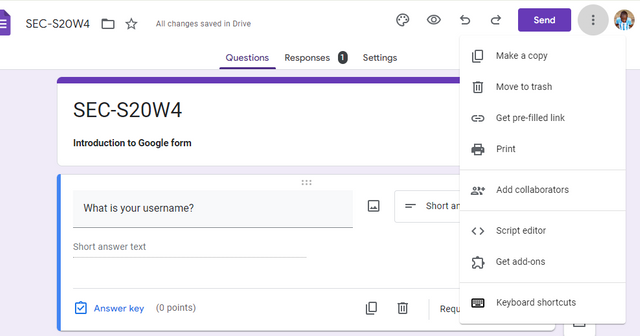
Send Your Form:
- Click the Send button at the top-right.
- Choose how to share your form:
- Via email.
- Via a link (click copy link).
- Embed it in a website (using the embed code).
- Share via social media.
- View Responses:
- Responses can be viewed by clicking the Responses tab at the top of the form.
- Responses can also be automatically collected in a Google Sheets file by clicking the Google Sheets icon.
Steps to Create a Google Sheet
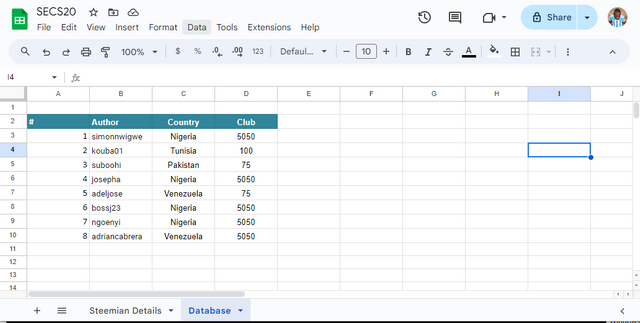
Follow the same procedure as in the creation of the form. Here we will look at a sample of a simple sheet for your better understanding.
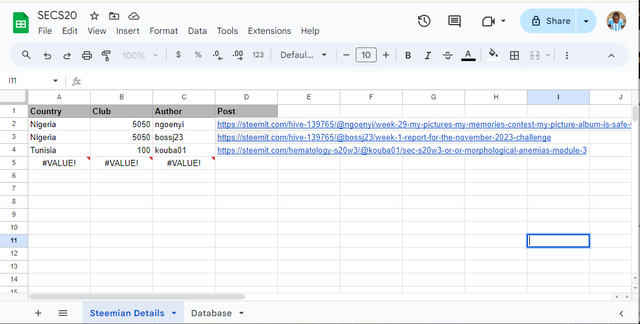 |  |
|---|
We have created a sheet that has student details and a database as you can see from the screenshot above. Now how do we get the author, name from the post link, the club status & country from the database? See the formula to use below.
Author =MID(D2,FIND("@",D2) + 1,FIND(CHAR(160),SUBSTITUTE(D2,"/",CHAR(160),5)) - 1 - (FIND("@",D2)))
Club Status =INDEX(Database!$D$2:$D$720, MATCH(C2,Database!$B$2:$B$720, 0))
Country=INDEX(Database!$C$2:$C$720, MATCH(C2,Database!$B$2:$B$720, 0))
Explain your understanding of Google Sheets and then describe in detail the various features of a Google Sheets, a pictorial representation of these features is necessary so ensure you have clear screenshots.
Create a simple Google form with the title Google Sheets 101 and use all the question types such as (Multiple choice, Short answer, Paragraph, Checkbox, Dropdown, etc) format to create your desired questions in the form. Customize all questions to be required and add a banner at the heading of your form. Clear screenshots are needed for this task.
Create a Google sheet titled SEC-S20W4 with two pages, the first page will be called Steemian Details and it should include the date of post, community posted, country, club, author, and Post link and the next page should be called Database. Your database should have author, country, and club so that when a post link is dropped in the Steemian details it can fetch the details automatically. (Ensure that your database has at least 30 Steemians and the same goes with the post link). Clear screenshots are needed for this task.
Using atleast pie chart & bar chart, show us the relationship between author and country as contained in the above question.
Attach the Link to the form and sheet and give access only to the following emails so that we can see your work properly.
Posts must be published in your blog and not in any community.
The title must be: "SEC | S20W4 | Google Sheets features and functionality (Creating Forms & Sheets)
The post must contain a minimum of 350 words, be free from plagiarism, and not use Artificial Intelligence (AI) or other forms of cheating.
Use the main hashtag #spreadsheet-s20w4 (required) among the first 4 tags
Add your country name hashtag (e.g. #nigeria)
If using the hashtag #burnsteem25 make sure you give 25% of the reward to @null
Invite 3 friends to participate.
Paste your participation link in the comment section, and don't forget to Vote and Resteem this post.
- This contest starts Monday, September 30, 2024, at 00:00 UTC and ends on Sunday, October 6, 2024, at 23:59 UTC."
Note: We will choose the winners based on the quality of the post, a quality post in our opinion is a post that can provide interesting ideas and new insights for its readers. Proper use of markdown is also part of the quality of a post.
Cc:
@josepha
Posts must be published in your blog and not in any community.
Professor, is there any reasons to why we cannot do that?
We don't want a double review on any post.
Alright, just what I had in mind. Thanks.
Okay I understand.
But it's still okay to post in a community, right?
Please note again the date this contest starts, September ends on the 30th.
Thanks
my entry https://steemit.com/spreadsheet-s20w4/@graceleon/sec-or-s20w4-or-google-sheets-features-and-functionality-creating-forms-and-sheets
@josepha and @simonnwigwe
My entry for SEC | S20W4 | Google Sheets features and functionality (Creating Forms & Sheets)
cc: @josepha
It's good class.. My entry: https://steemit.com/spreadsheet-s20w4/@aneukpineung78/sec-or-s20w4-or-google-sheets-features-and-functionality-creating-forms-and-sheets.